Setup
Info
This guide aims at showing how to create a local Bip instance for development purposes. It can be either for using the SDK in a non-production environment or for working of the codebase.
You can't just import bip like that. For this import to raise no error, the following requirements must be met:
- A compatible Neo4j database must be running.
- A configuration file must be set.
Pre-requirements
Neo4j
Create database
From Neo4j Desktop, create a new local database.
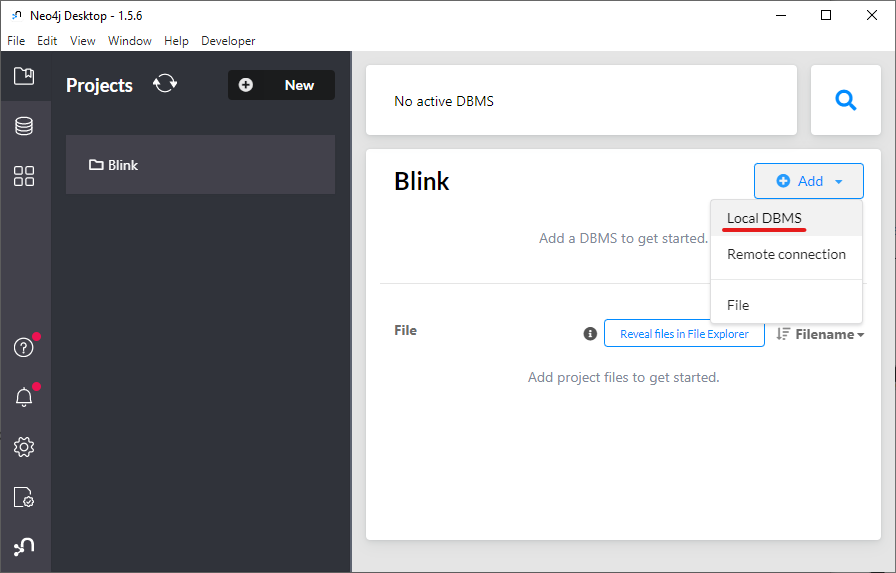
Give it a name and a password.

Activate APOC plugin
Bip uses some special graph functions, bundled into a plugin called APOC, that are not enabled by default when a new Neo4j database is created.
In order to enable it: - Select the database (it must not be started). - On the right panel, go to the Plugins tab. - Select APOC and install it.

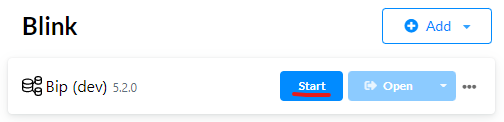
Run database
The database is ready. Activate it by starting it.
Warning
Neo4j Desktop can only be running one database at the time. If you are working between production and development, that means you'll have to switch the active database. Make sure you know which one is active when you are running code.
Bip
Note
Every step are shown in bash command (which can be executed from the Git Bash program), but everything can also be done from an IDE such as Pycharm of Vscode.
Clone codebase
Clone the Bip client repository (https://git.blinkink.co.uk/bip/client.git) to your development working directory.
Tip
For consistency, it is recommended to follow a conventional structure in your development working directory, so all developers work the same way. In the next steps, you should clone repositories of create directories following this structure.
- Create a
bipdirectory, and addbip/apps,bip/handlers,bip/config,bip/working,bip/scriptsandbip/pythonempty directories. - Choose "Clone from VSC" and clone
https://git.blinkink.co.uk/bip/client.gittopath/to/your/working/directory/bip/client.

mkdir -p bip/apps bip/handlers bip/python bip/config bip/working bip/scripts
cd bip
git clone https://git.blinkink.co.uk/bip/client.git
cd client
Create virtual environments
Main (Python 3.9)
Create a main Python 3.9 virtual environment from requirements.txt.
- Interpreter menu (bottom bar) > Add New Interpreter > Add Local Interpreter...
- Set the location to
path/to/bip/python/main. - Make sure the base interpreter is Python38.
- Create.
- After the venv creation is completed, open the Terminal panel.
- Make sure the venv is active ("(main)" should be the beginning of the prompt line").
- Install requirements: `pip install -r requirements.txt

cd path/to/bip
mkdir python
/c/path/to/Python38/python.exe -m venv python/main
cd python/main/Scripts
. activate
pip install -r path/to/bip/client/requirements.txt
exit
Hosted (Python 3.9)
Create a hosted Python 3.9 virtual environment from requirements-hosted.txt.
Warning
Even if you are not going to work in hosted context, it is better not to skip this step for consistency.
- Interpreter menu (bottom bar) > Add New Interpreter > Add Local Interpreter...
- Set the location to
path/to/bip/python/hosted. - Make sure the base interpreter is Python37.
- Create.
- After the venv creation is completed, open the Terminal panel.
- Make sure the venv is active ("(hosted)" should be the beginning of the prompt line).
- Install requirements:
pip install -r requirements-hosted.txt
cd path/to/bip
/c/path/to/Python37/python.exe -m venv python/hosted
cd python/hosted/Scripts
. activate
pip install -r path/to/bip/client/requirements-hosted.txt
exit
Content repository
The Content repository is the place where TD can safely tailor Bip to their needs. Every running client must have a content repository set, even if it is empty.
Warning
The Content repository cannot be a local repository, it must be cloned from a remote source.
Create your content repository and clone it somewhere. It is recommended cloning it next to the client repository. (bip/content)
Working directory
If it has not been done in the previous steps, create an empty working directory. In production, that directory is usually the network location where artists are working. In development, it is highly recommended to use a different one, store locally, to avoid any clash with the production instance. It is recommended creating it next to the client repository. (bip/working)
Configuration
When Bip is imported from a python script, it will look for two files during its initialization: config.yml and auth.yml. By default, those files are expected to be found in ~/.blink/.
Warning
If you are working in parallel with a regular Bip client installation, those files will be conflicting between your development the production configuration. You should then specify an alternative path for those files using their dedicated environment variables: BIP_CONFIG and BIP_AUTH. For safety, this is the recommended way.
- Create a directory for your configuration files, for instance
bip/config/and create two empty filesconfig.ymlandauth.yml. - Populate
config.ymlwith the following configuration, and change the content and working paths. - Make sure the database URI and user are matching your Neo4j information. If you left everything by default, the URI should be
bolt://localhost:7687and the user should beneo4j.
current_hash: null
current_environment: null
database:
  uri: bolt://localhost:7687
  user: neo4j
hostname: null
paths:
  content: /path/to/bip/content
  working: /path/to/bip/working
startup: true
version:
  custom_branch: null
  custom_tag: null
  mode: server
Setup database
The Neo4j database running in the background is still empty. It must be setup with essential data and rules to start using Bip properly.
- Open the client repository with Pycharm.
- Attach to it all the useful repositories or directories, such as
config,scriptsandcontent. - In Settings > Project: client > Project Dependencies, make sure to add "client" into the "scripts" dependencies.

- Create a
init_database.pyfile in thescriptsdirectory. - Copy and paste the following snippet to
init_database.py.
from bip import link

link.tools.install(content_source="https://github.com/me/my-bip-content.git")
- Change the
content_sourcevalue to your Bip content repository.
Tip
The default Bip username is admin, and its password is bip. If you want something else, you can specify it with the username and password parameters.
Before running the script, we must add some environment variables to its configuration.
- Go to Run > Run... (Alt+Shift+F10) > init_database, click on the arrow on the right > Edit...
Add the following environment variables:
| Key | Value |
|---|---|
BIP_CONFIG |
C:\path\to\bip\config\config.yml |
BIP_AUTH |
C:\path\to\bip\config\auth.yml |
BIP_DATABASE_PASSWORD |
your-database-password |

Now you can run the script (Shift+F10).
It will take up to 30 seconds to complete.
Login and active project
Before being able to use bip in your scripts, you must log in first. The database access is subject to privilege checking, therefore it is impossible to use Bip anonymously. An active project must also be assigned to the user. Some API features would not work properly if the user has no active project since it is made mandatory through UI on regular Bip installation.
Create a foo.py script and copy/paste the following snippet.
Note
- If you have not specified a different username and password for the default user, the default username is "admin" and the default password is "bip".
- If you have left the
populate_defaultargument to True (as it is by default), there is a sample project tag "basic" and and sample project "demo". If you disabledpopulate_default, you must create a project with the API after login in.
from bip import mink, link

# Login
user = mink.login.connect(username="admin", password="bip")

# Set active project
tag = link.project.get_tag("basic")
demo = link.project.get_project(slug="demo", tag=tag)
user.set_active_project(demo)